How to Start Making Polymer Clay Jewelry: A Step-by-Step Guide
Polymer clay jewelry has become a popular craft, allowing creators to design unique, handmade pieces with endless possibilities. Whether you’re a beginner or looking to refine your skills, this guide will walk you through everything you need to start making polymer clay jewelry successfully.
What is Polymer Clay Jewelry?
Polymer clay jewelry is handmade jewelry crafted from polymer clay, a versatile, oven-bake material that can be shaped, textured, and colored in various ways. This type of clay is lightweight, durable, and perfect for making earrings, pendants, bracelets, and more.

Essential Tools and Materials for Making Polymer Clay Jewelry
Before you start crafting, you’ll need some essential tools and materials:
-
Polymer Clay – Brands like Sculpey, Fimo, and Premo are great choices.
-
Clay Cutters – QTcutters offer precision for creating consistent shapes.
-
Rolling Pin or Pasta Machine – Helps flatten the clay evenly.
-
Baking Surface – A ceramic tile or glass surface ensures even baking.
-
X-Acto Knife or Craft Blade – For fine cuts and details.
-
Dotting Tools or Toothpicks – For creating textures and patterns.
-
Jump Rings and Earring Hooks – Essential for assembling jewelry pieces.
-
Sandpaper or Buffing Block – Smooths the edges after baking.
-
Glaze or Resin (Optional) – Adds shine and protection to finished pieces.
Step 1: Condition the Clay
Polymer clay needs to be softened before use. Knead it with your hands or pass it through a pasta machine until it’s pliable and smooth. Conditioning ensures better flexibility and prevents cracking during baking.
Step 2: Roll and Cut Your Shapes
Once conditioned, roll out the clay to an even thickness (about 3-4mm). Use QTcutters or a sharp knife to cut out shapes for earrings, pendants, or beads. For symmetrical pieces, use cutters for consistent sizing.
Step 3: Add Texture and Design to Your Polymer Clay Jewelry
Enhance your piece of art by adding textures or patterns. You can:
-
Use stamps or texture rollers for unique designs.
-
Press lace or fabric to create intricate patterns.
-
Mix colors or use the marbling technique for artistic effects.
Step 4: Bake the Clay Properly
Preheat your oven according to the clay manufacturer’s instructions (usually 260°F – 275°F for 15-30 minutes). Place the pieces on a ceramic tile or parchment paper to bake evenly. Avoid overbaking, as it can cause discoloration.
Step 5: Sand and Smooth the Edges
Once cooled, use fine-grit sandpaper to smooth out rough edges and surfaces. Buffing will give the pieces a professional finish. If you want a glossy look, apply a thin coat of resin or glaze.
Step 6: Assemble Your Jewelry
Attach earring hooks, jump rings, or necklace chains using pliers. Ensure all metal findings are securely fastened to prevent them from loosening over time.
Step 7: Finishing Touches
To protect and enhance your final piece, you can:
-
Apply a light glaze for a polished look.
-
Leave it matte for a natural finish.
-
Store pieces in a dry, cool place to maintain quality.
Tips for Beginners
-
Start with Simple Shapes: As you gain confidence, experiment with intricate designs.
-
Keep Hands Clean: Dust and lint can stick to clay easily, so wash hands frequently.
-
Test Bake a Sample: Different ovens have variations in temperature, so test-bake a small piece first.
-
Experiment with Colors: Mixing different clay colors can create unique shades and gradients.
Why Polymer Clay Jewelry is a Great Hobby or Business
Making polymer clay jewelry is not only a fun and relaxing hobby but also a profitable business opportunity. Handmade jewelry is in high demand, and selling through Etsy, Instagram, or local craft fairs can turn your passion into income.
Related Products
-
Custom Business Logo Stamp – 7x10cm
37,00 € – 43,00 € -
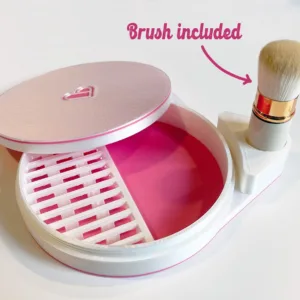
Polymer Clay Corn Starch Storage Box + Soft Brush
17,00 € – 22,00 € -
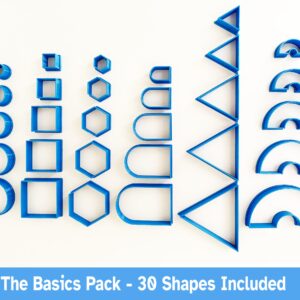
Polymer Clay Set of 30 Cutters
4,68 € – 17,95 €


